Background
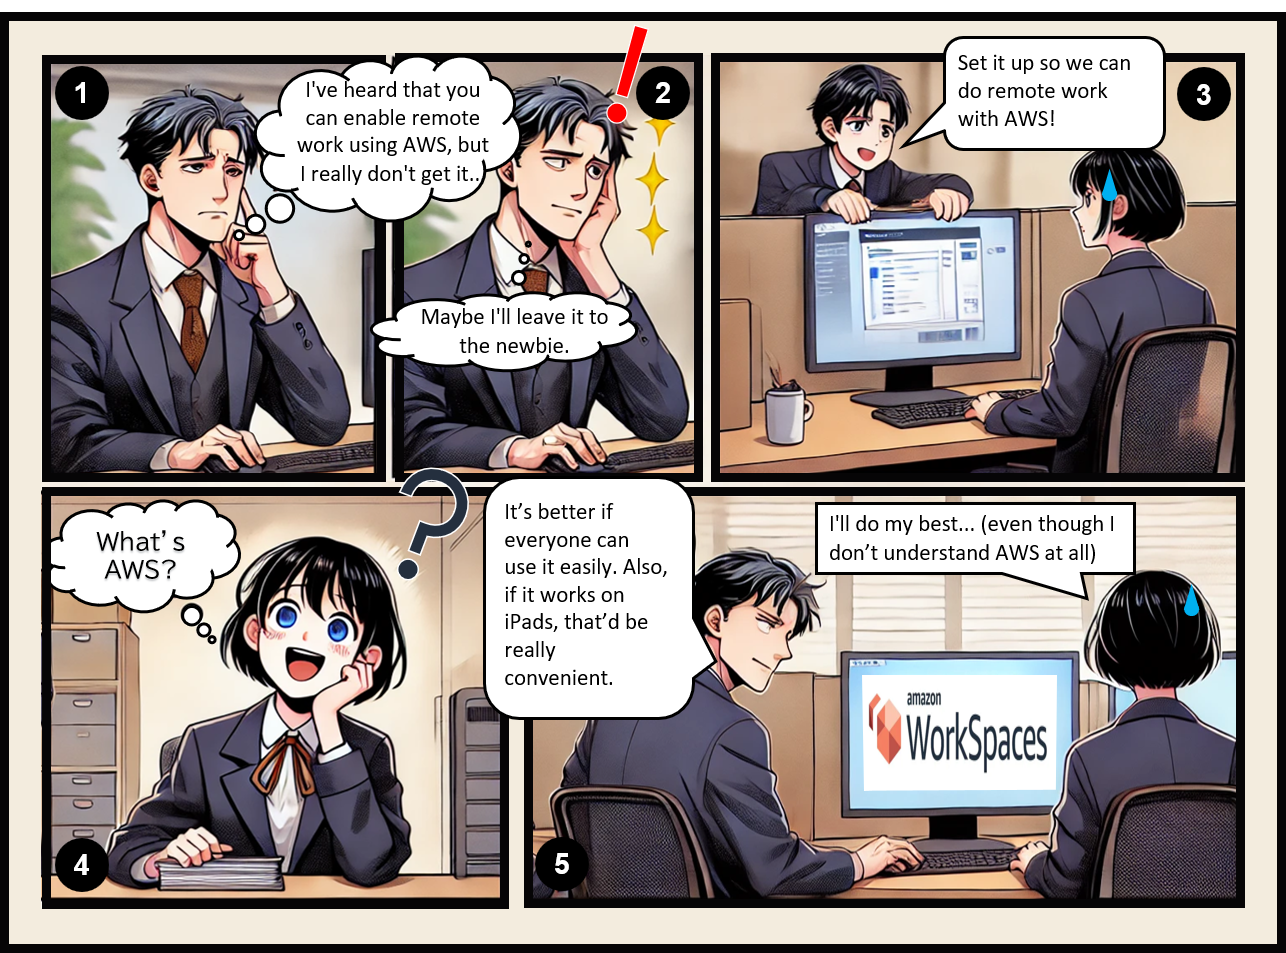
After joining the company, my manager asked me to set up a remote work environment using AWS.
Being the only one with a science background, they entrusted me with this task, even though I had never used AWS before.
At our company, employees go to the office and work from their assigned desktop computers.
To meet my manager’s request, I began by studying AWS.
Challenges
The work itself is done using software installed on company desktop computers.
I suggested installing this software on laptops and distributing them to employees, thinking that remote work would be possible without AWS.
However, this approach revealed several issues:
- The software restricts usage based on the IP address, so it can only be used from approved IP addresses.
- Files created through the software must be saved on a drive within the internal company network.
While using Google Drive could address the latter, the former seemed challenging.
Allowing remote work would require authorizing the IP addresses of each employee’s home network.
Solution
I found that using AWS Amazon WorkSpaces allows us to provide each employee with a virtual desktop environment.
These virtual desktops exist within a virtual network (VPC) and require a specified outbound connection to the internet.
By using a NAT gateway, we can fix the IP address for internet access, enabling access to the desktop from anywhere with internet connectivity.
Here’s an overview of the setup:

Administrator’s Procedure
The AWS account has already been created with the company’s credit card, and the management console is logged in.
Create VPC
- Create the VPC and subnets from the following URL:
https://us-east-1.console.aws.amazon.com/vpcconsole/home?region=us-east-1#CreateVpc:createMode=vpcWithResources - Create using the following settings (leave except for the underlined items as default):
- Resources to Create: VPC and more
- This will also create the subnets.
- Name tag auto-generation: ☑️ Auto-generate "Remote work"
- VPC and subnet names will be automatically generated. They can be changed later.
- IPv4 CIDR block: 10.0.0.0/16
- This is the private IP address range for the VPC. It cannot be changed later.
- It has nothing to do with the public IP address when going out to the Internet.
- Number of Availability Zones (AZs): 2
- Number of AWS data centers for subnet placement.
- Number of public subnets: 2
- Number of subnets that can access the internet.
- Number of private subnets: 2
- Number of subnets that cannot access the internet.
- NAT gateways ($): In 1 AZ
- Configure whether to place a NAT gateway in each AZ.
- It incurs costs per gateway, so one is created in a single AZ.
- (The ($) symbol indicates that a fee will be charged?)
- VPC endpoints: S3 Gateway
- Allows direct access from the VPC to S3, contributing to cost savings.
- The installation itself is free of charge and seems to contribute to the reduction of the fee, so I'll leave it on as is.
- Resources to Create: VPC and more
Image

Set up directory
- Create the directory (for managing users) from the following URL:
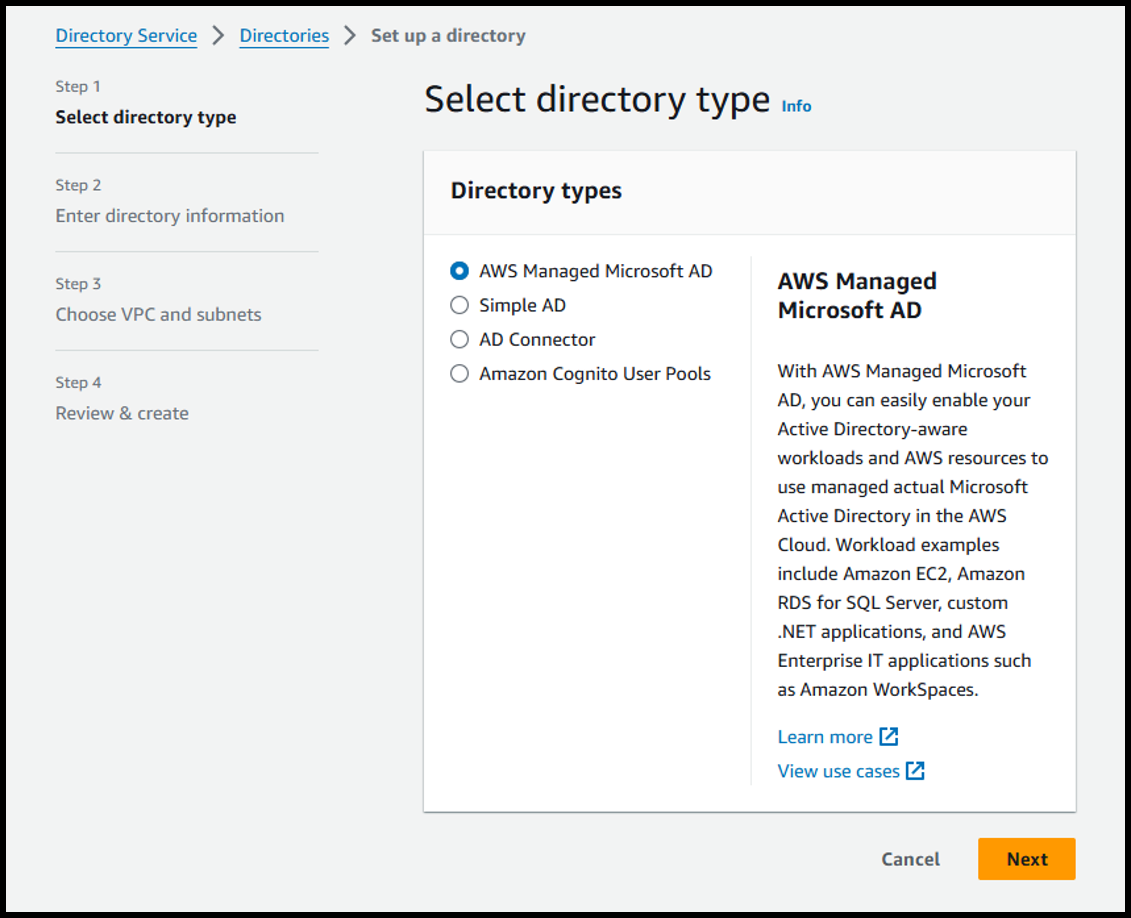
https://us-east-1.console.aws.amazon.com/directoryservicev2/home?region=us-east-1#!/create - [Step 1] Select directory type
- Directory type: ⦿ AWS Managed Microsoft AD
Image
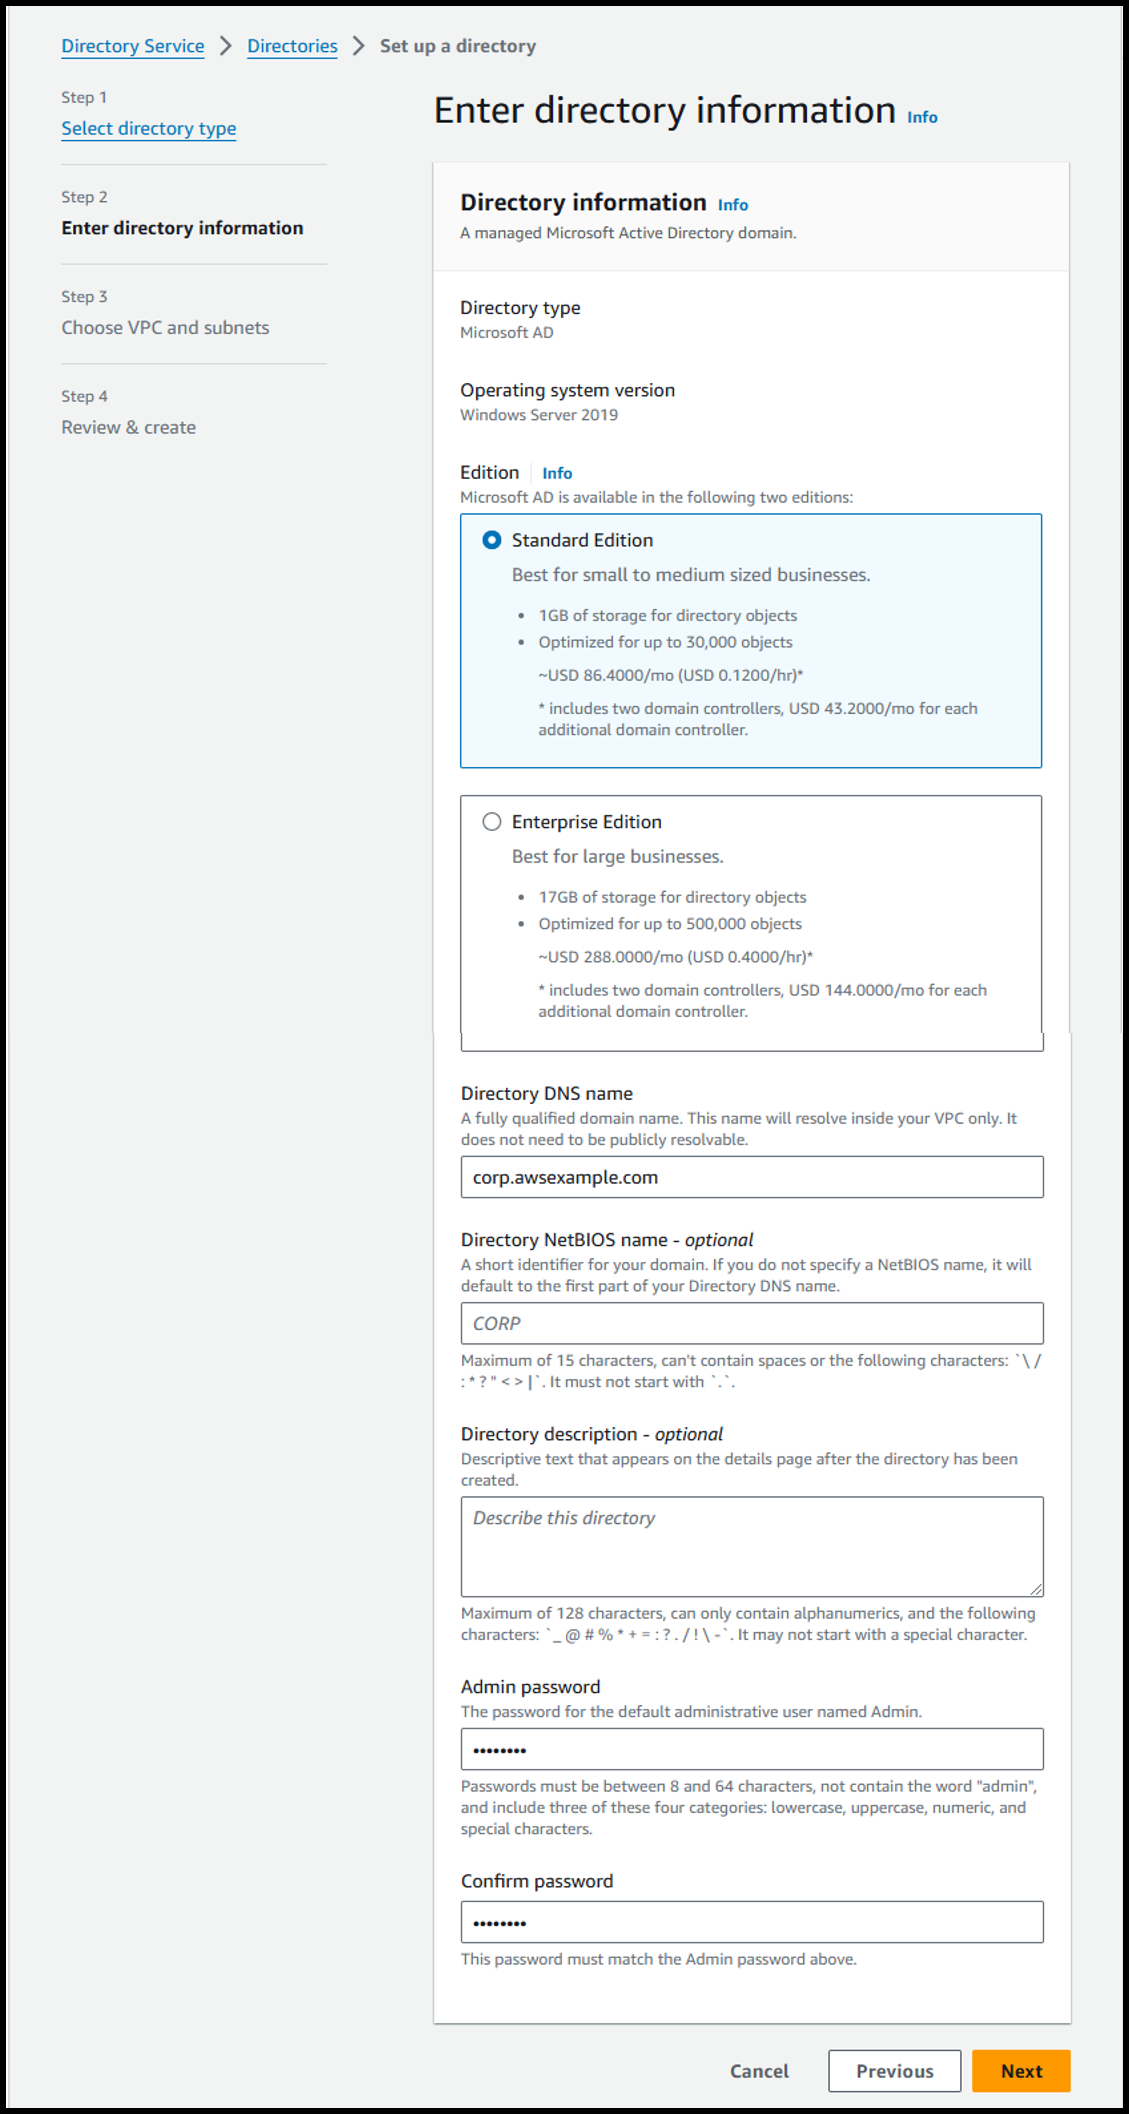
- [Step 2] Enter directory information
- Edition: ⦿ Standard Edition
- Directory DNS name: corp.awsexample.com
- Admin password: **********
Image
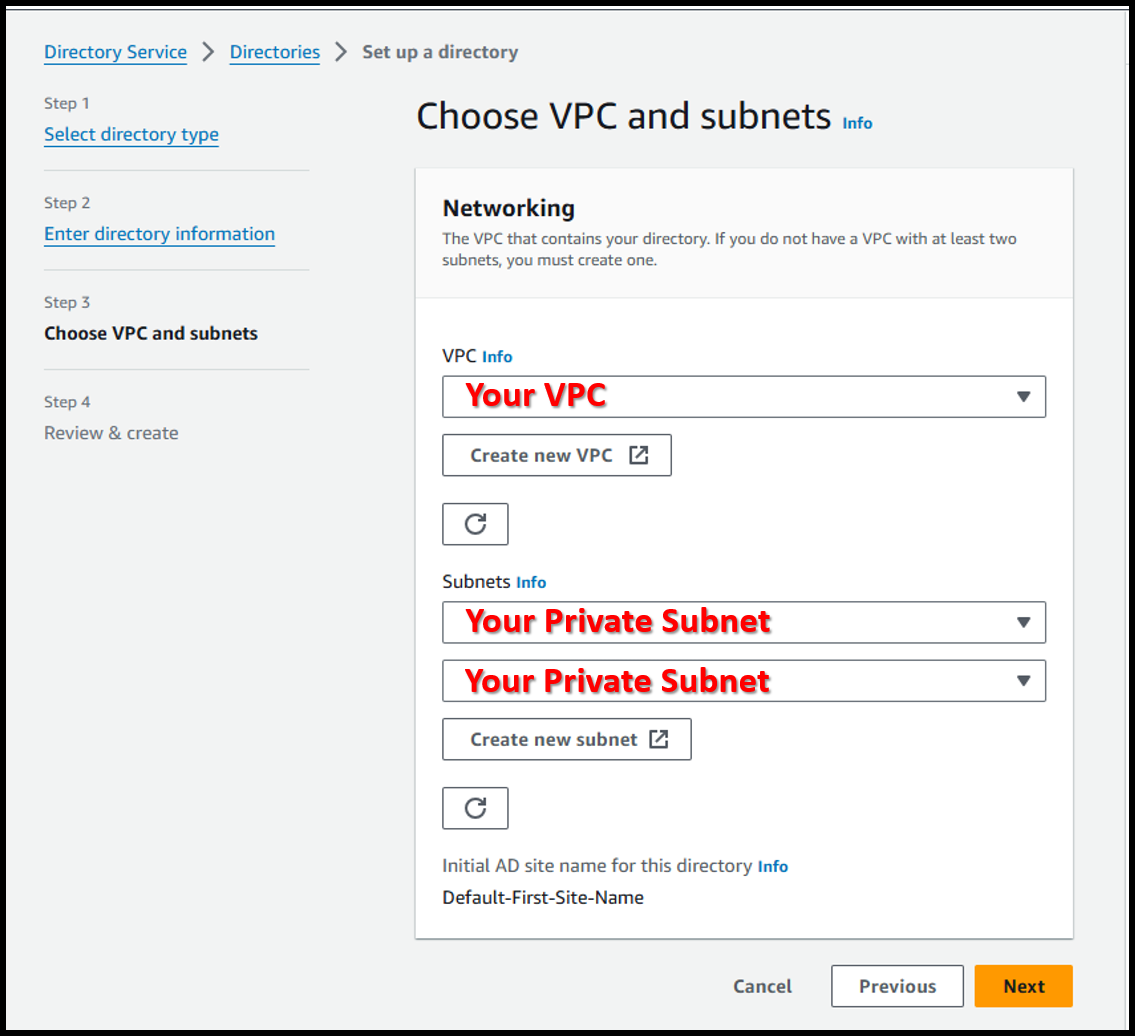
- [Step 3] Choose VPC and subnets
- VPC: VPC created in Create VPC
- Subnets: Two private subnets created in Create VPC
Image
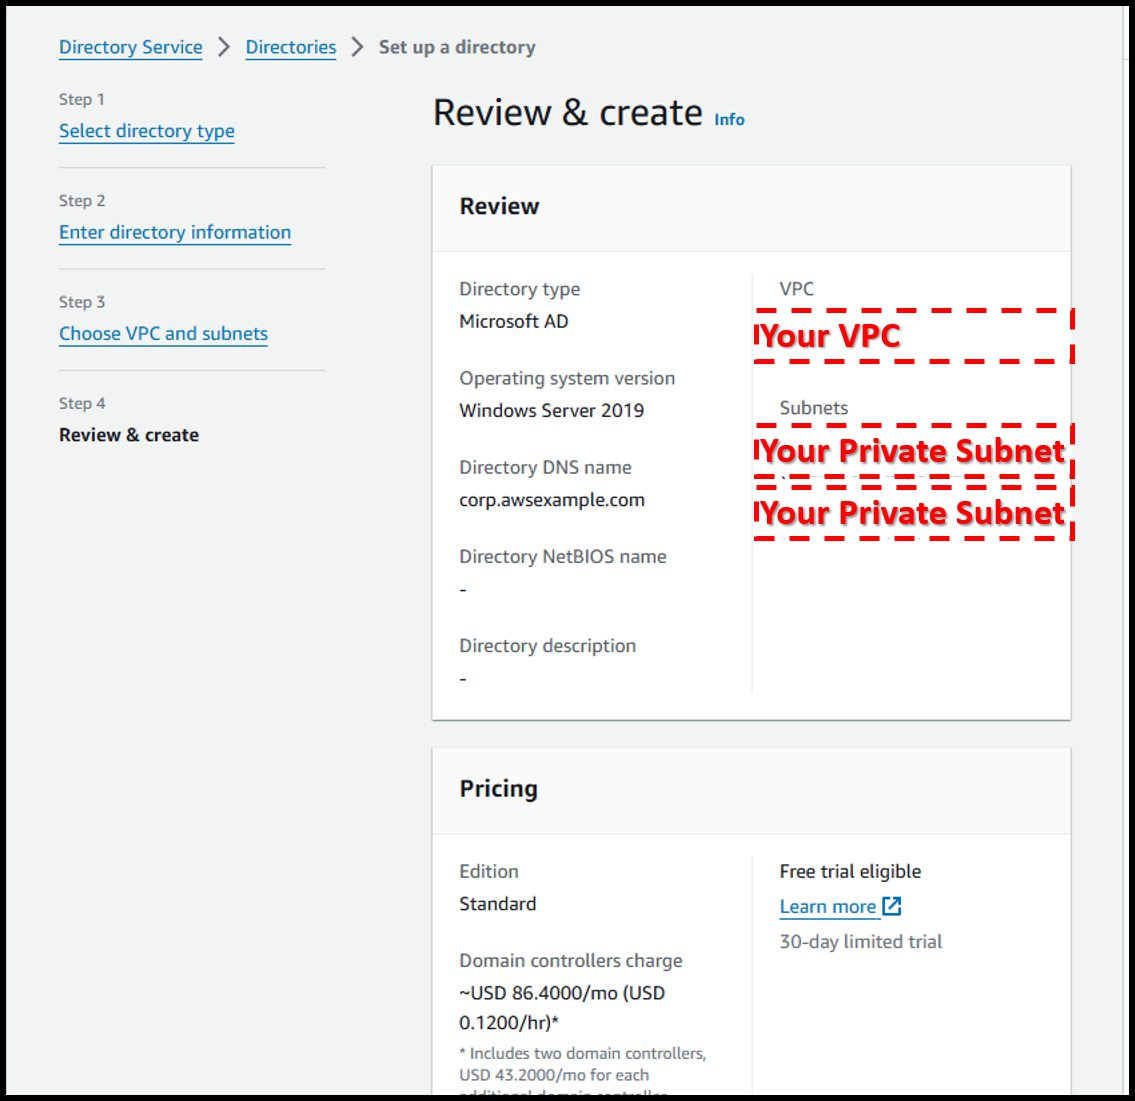
- [Step 4] Review & create
- Click on [Create directory]
Image
Register a directory
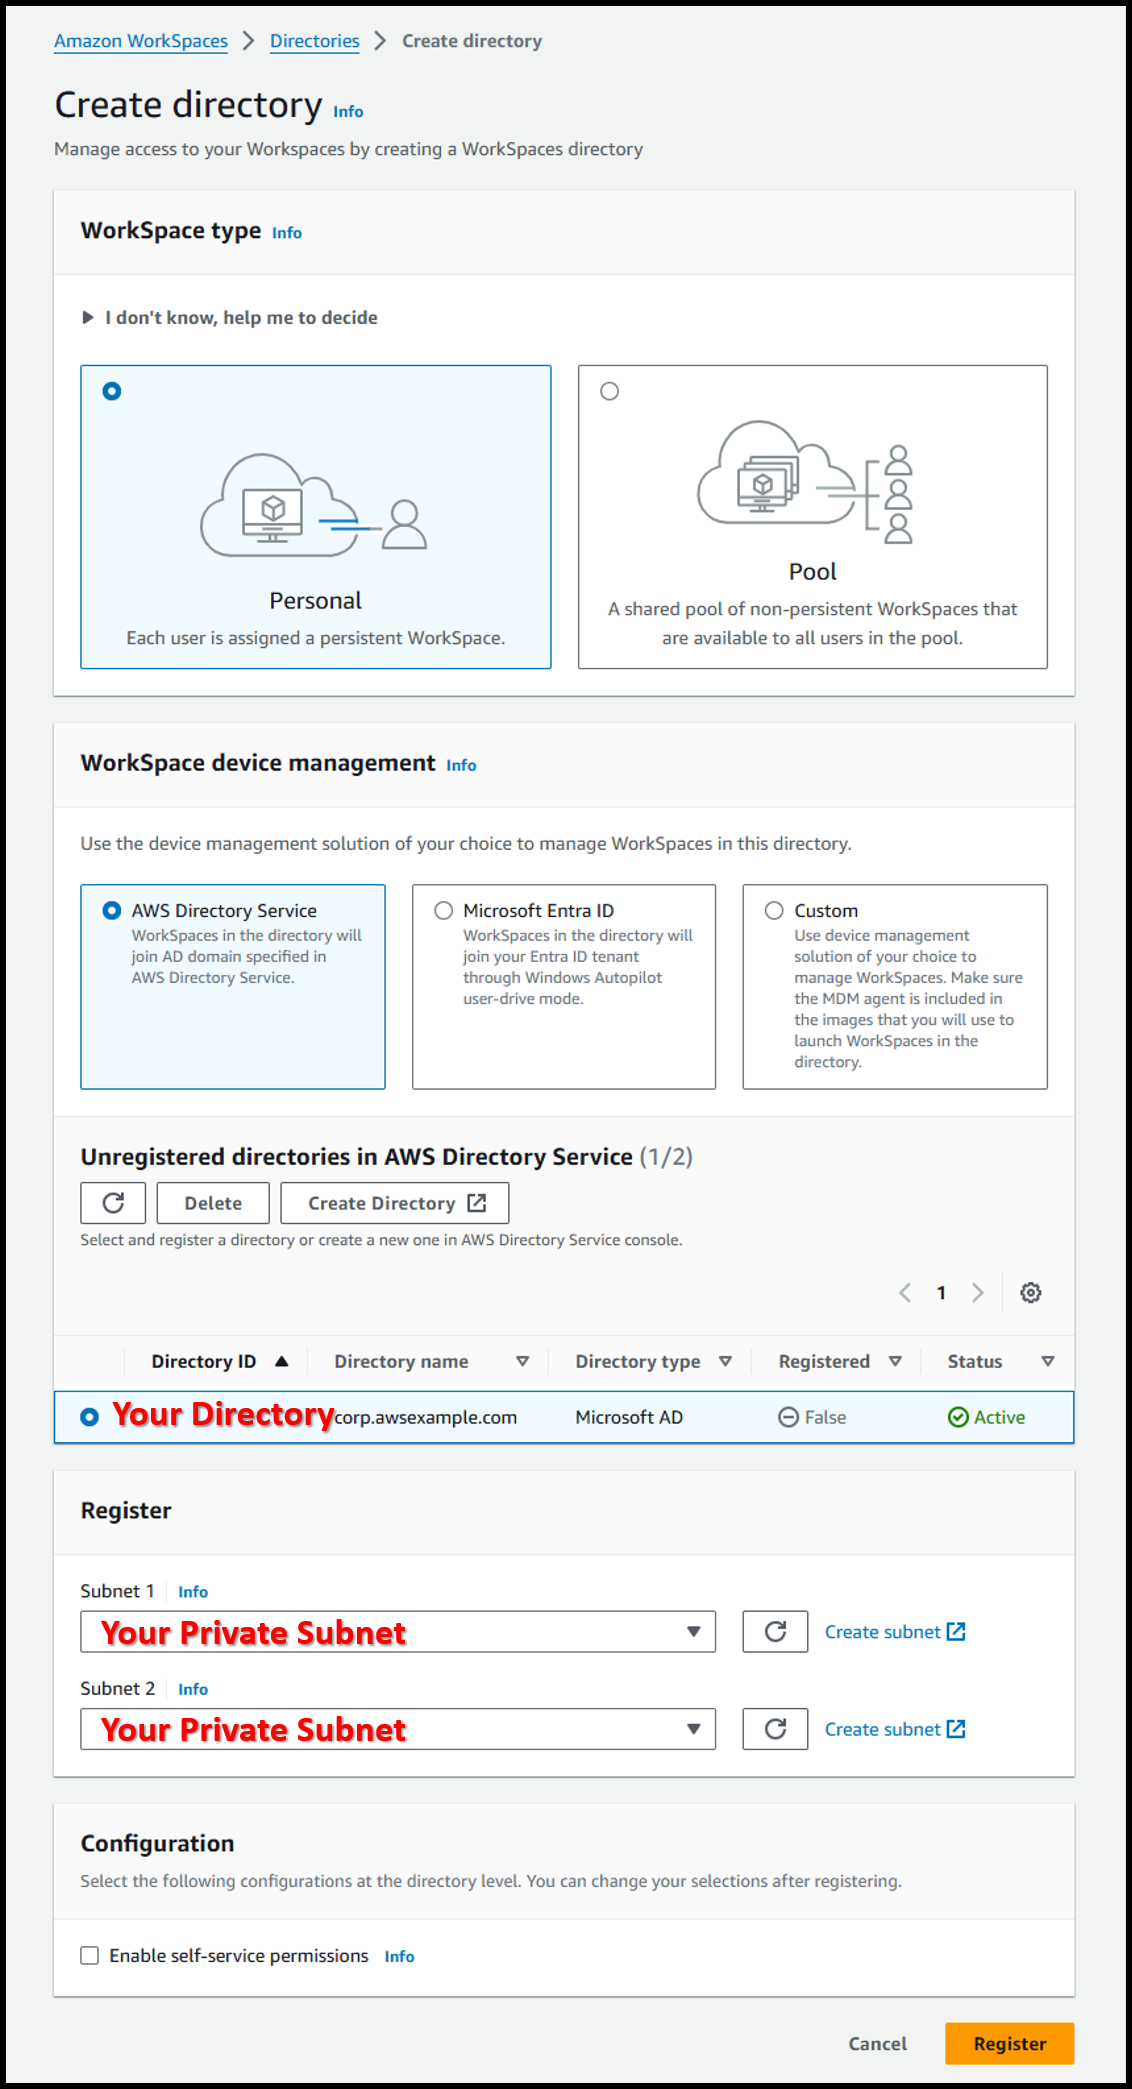
- Register a directory for use with WorkSpaces at the following URL
https://us-east-1.console.aws.amazon.com/workspaces/v2/directories/create-directory - Register with the following settings
- WorkSpace type: ⦿ Personal
- WorkSpace device management: ⦿ AWS Directory Service
- Unregistered directories in AWS Directory Service: ⦿ Directory created in Set up directory
- Register: Two private subnets created in Create VPC
Image
Create WorkSpaces
- Create WorkSpaces from the following URL
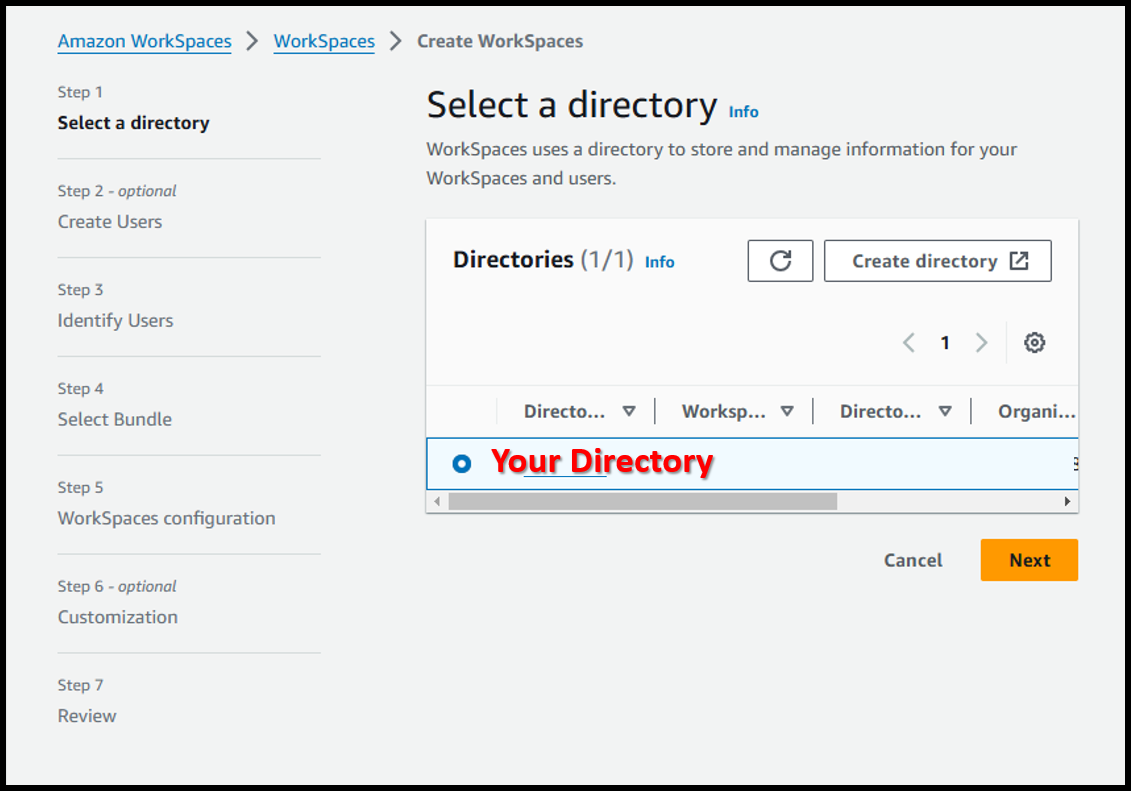
https://us-east-1.console.aws.amazon.com/workspaces/v2/workspaces/create-workspaces - [Step 1] Select a directory
- Directory: ⦿Directory created in Set up directory
Image
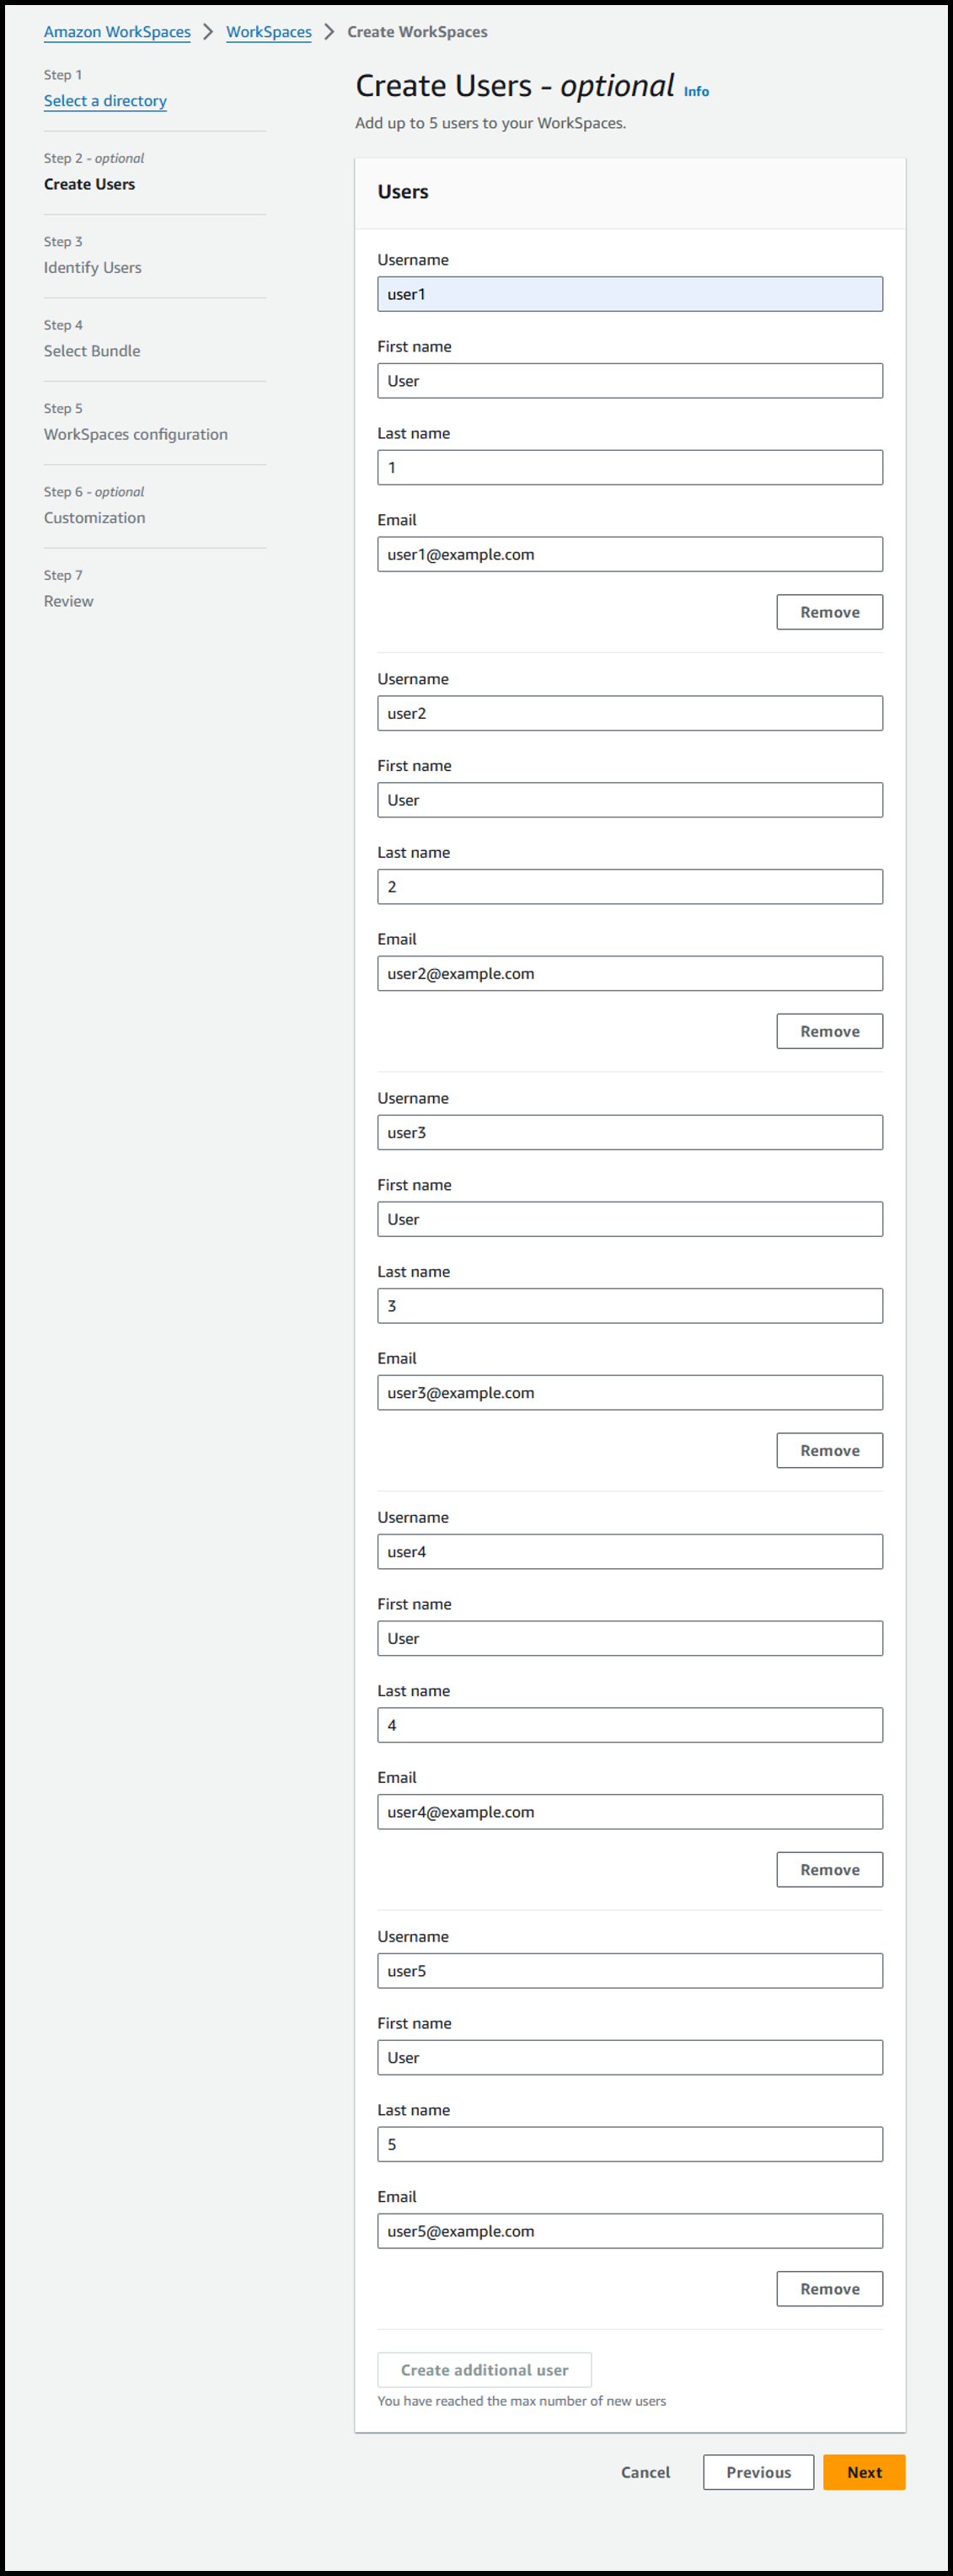
- [Step 2- Optional] Create Users
- Users: Register 5 employees who want to work remotely.
- Username: ID of the employee when he/she logs in
- First name: First Name of the employee
- Last name: Last Name of the employee
- Email: Internal email address
- Users: Register 5 employees who want to work remotely.
Image
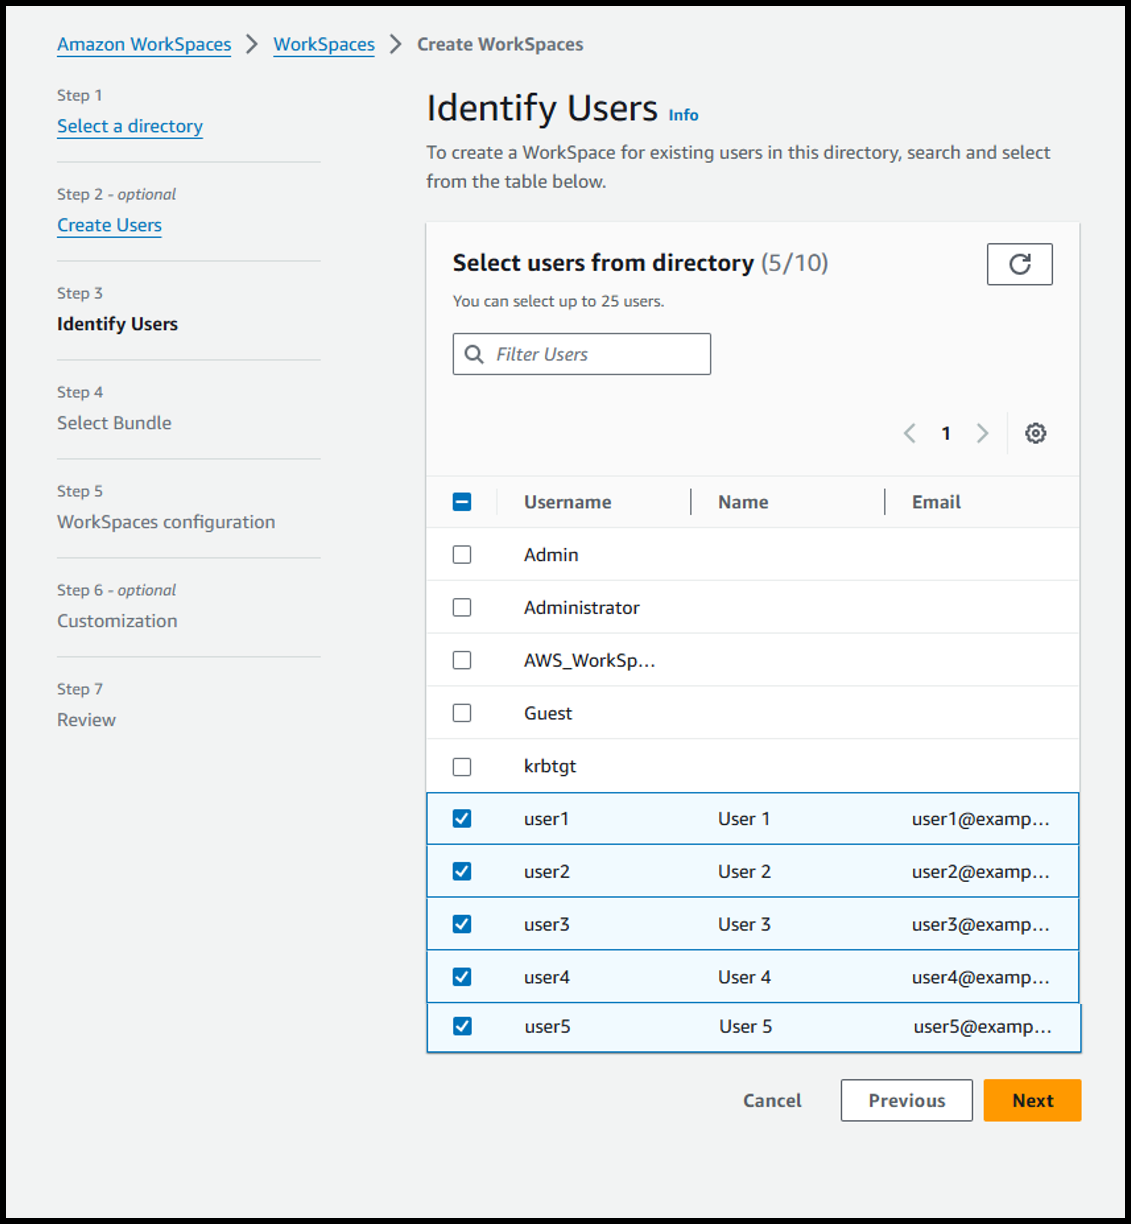
- [Step 3] Identify Users
- Select a user from the directory: Select the user you have created
Image
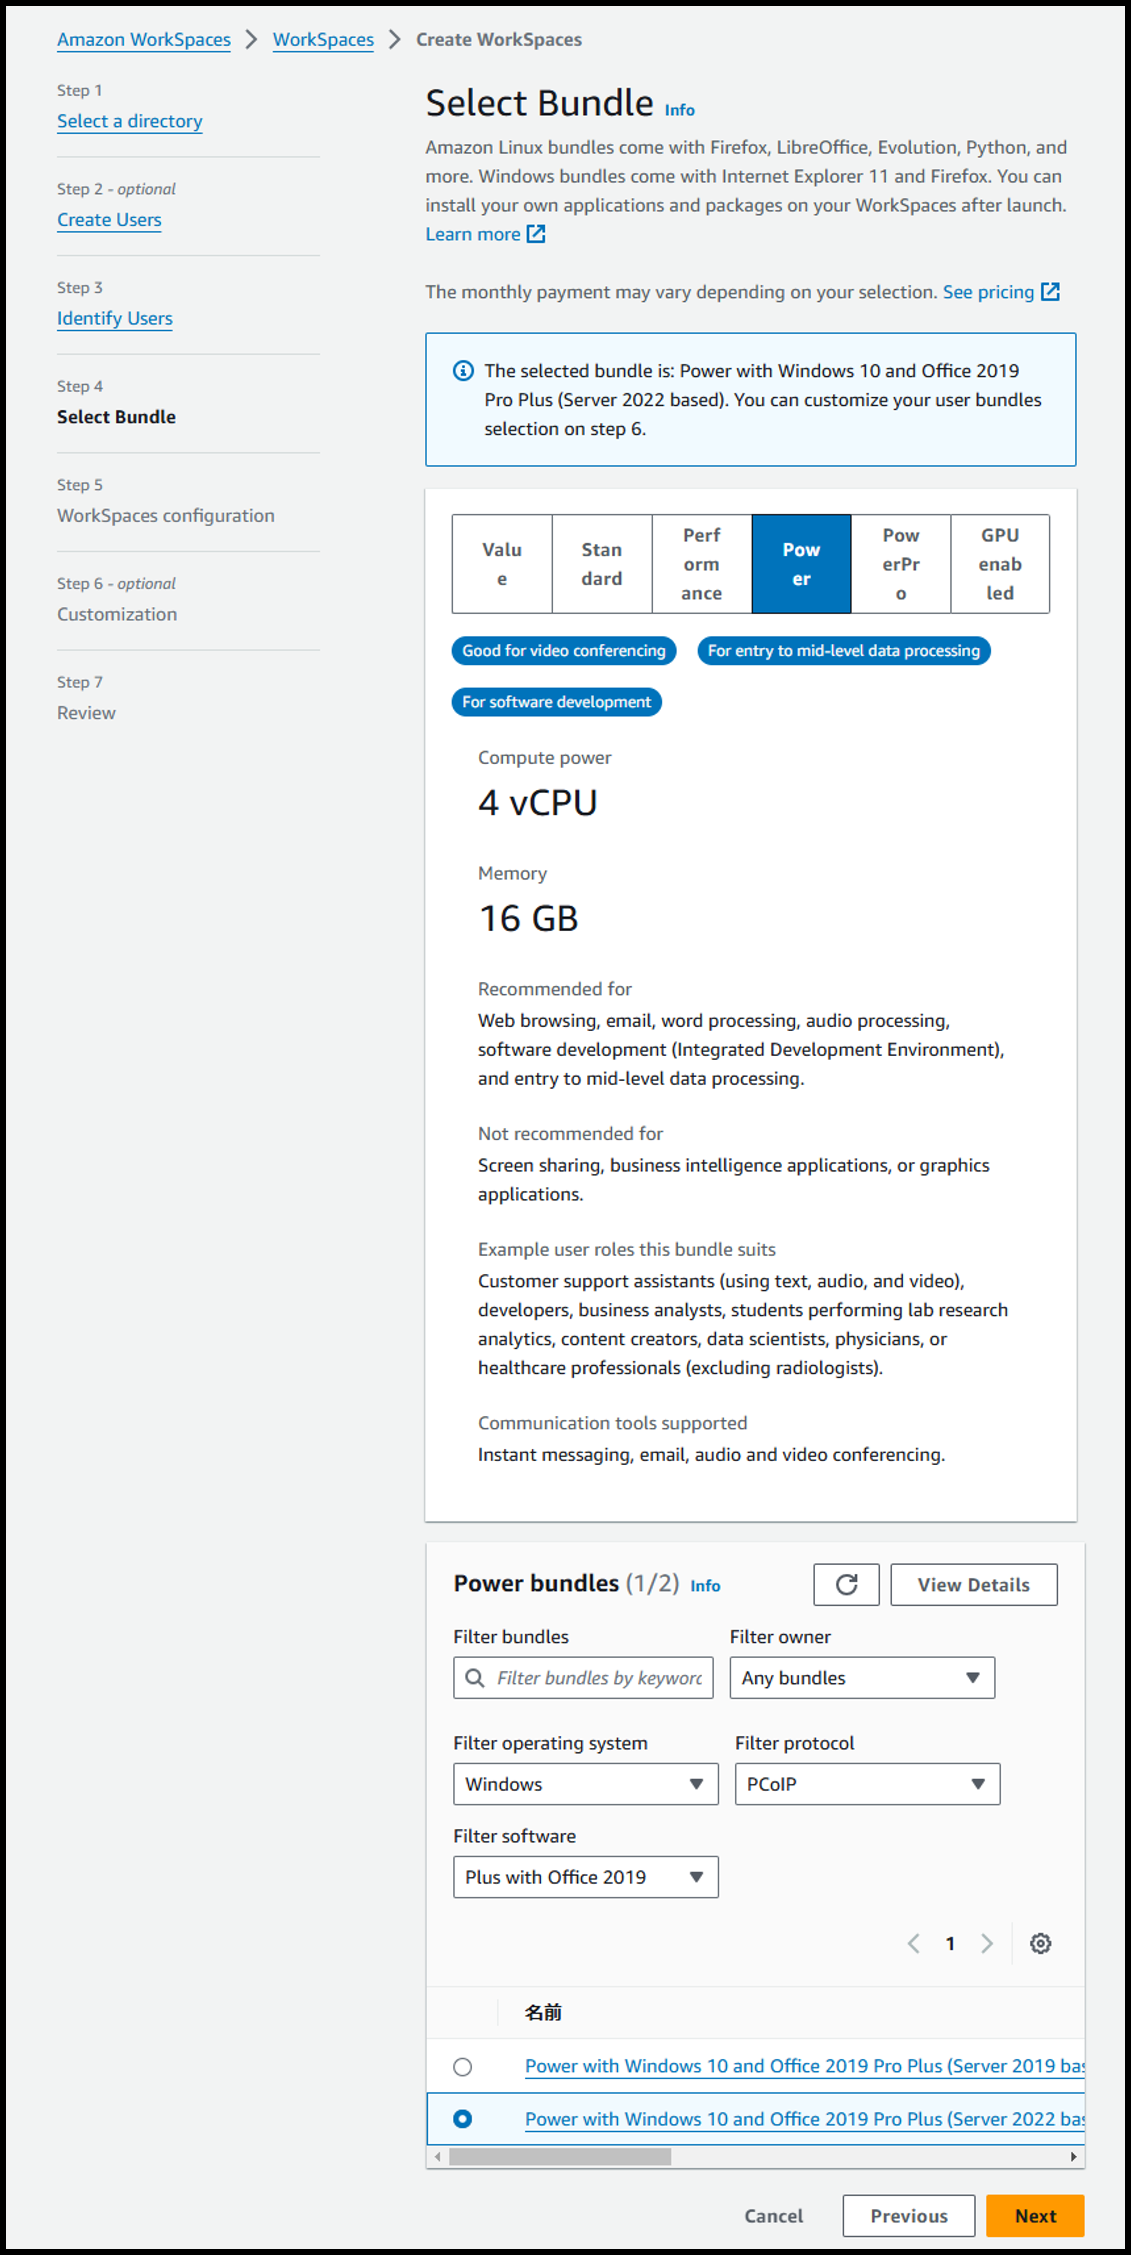
- [Step 4] Select Bundle
- Select Bundle: Power
- Power bundles: ⦿ Power with Windows 10 and Office 2019 Pro Plus (Server 2022 based)
- Filter operating system: Windows
- Filter protocol: PCoIP ( because we want to use it also on iPad†)
- Filter software: Plus with Office 2019
Image
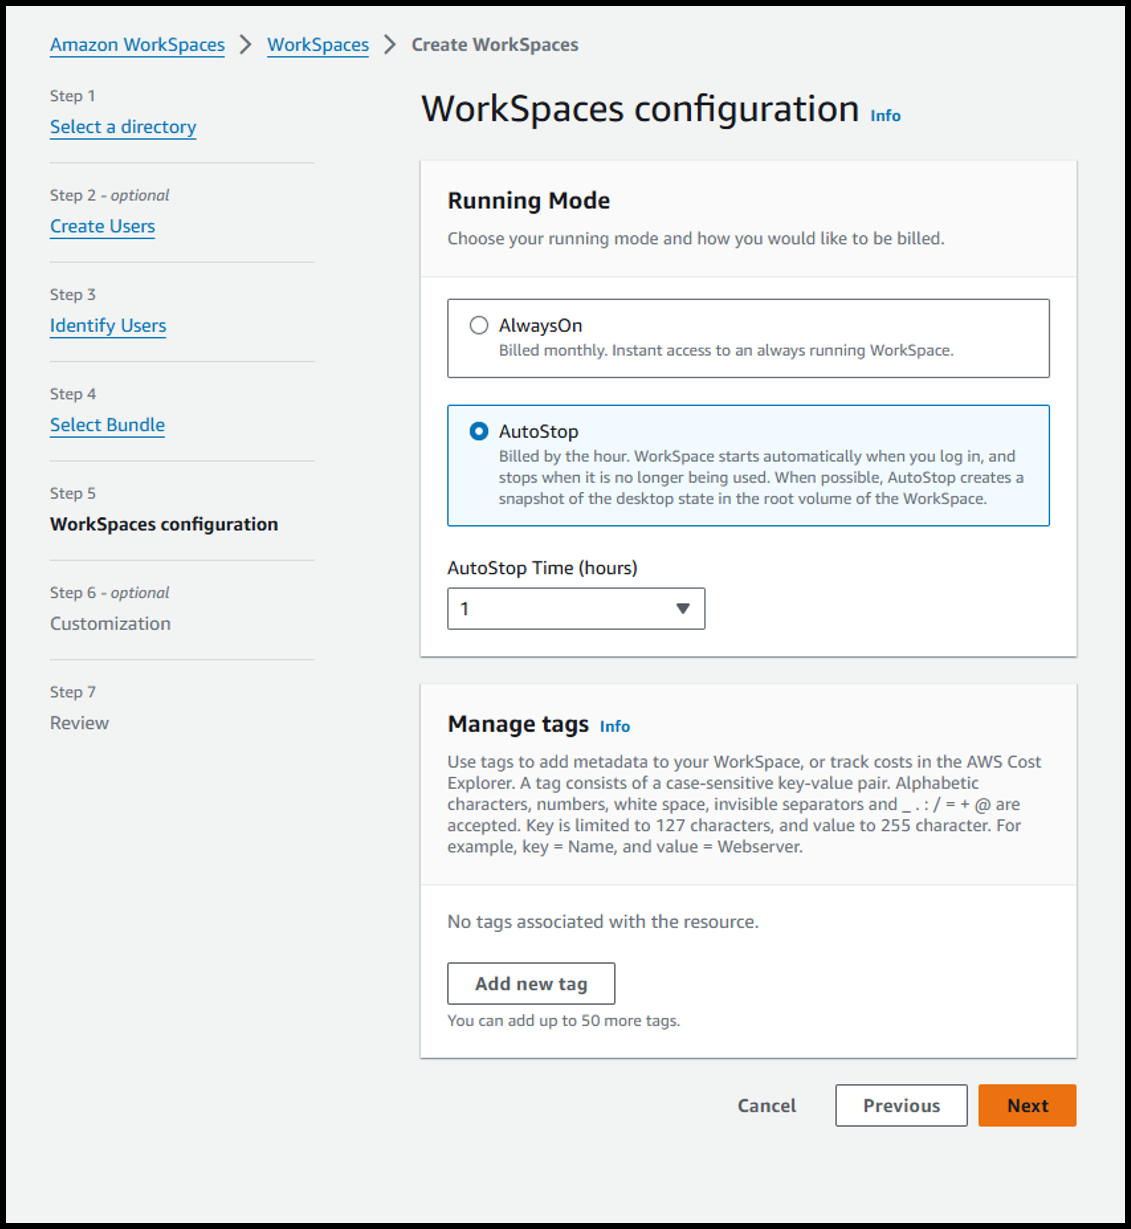
- [Step 5] WorkSpaces configuration
- Running Mode: AutoStop
- AutoStop Time (hours): 1
Image
- [Step 6 - Optional] Customization
- Do nothing [Next]
Image

- [Step 7] Review
- Click [Create]
Image

After the above steps, an email with login instructions will be sent to the registered employee's email address.
Repeat [Step 2 - Optional] to add more users.
Some users did not receive the email containing the login instructions. While the reason for the discrepancy is unclear, in such cases, you can select the relevant WorkSpace from the following URL and resend the invitation email by navigating to [Actions] > [Invite users]:
https://us-east-1.console.aws.amazon.com/workspaces/v2/workspaces
User‘s Procedure
- Follow the steps in the email you received and set your password.
- Install the WorkSpaces client on your home computer or iPad.
- Ask them to confirm that they can log in with their username and password from the WorkSpaces client.
This is the process in a nutshell, but it was a long way for a beginner.
It took me more than a month, but with some help, I managed to get it up and running.
I hope this will be of some help to someone.
